How to Start a WordPress Site: A Step-by-Step Guide
Starting a WordPress site can seem daunting if you’re new to web development, but it’s one of the most user-friendly platforms available. Whether you’re launching a blog, portfolio, or online store, WordPress offers a robust and flexible system for creating and managing your website. In this guide, we’ll walk you through the essential steps to get your WordPress site up and running.
1. Understanding WordPress: WordPress.com vs. WordPress.org
Before diving in, it’s important to distinguish between WordPress.com and WordPress.org.
- WordPress.com: A hosted solution where WordPress takes care of everything from hosting to backups. It’s ideal for beginners who want a hassle-free setup, but it comes with limitations on customization and monetization.
- WordPress.org: Often referred to as self-hosted WordPress, this version gives you full control over your site. You need to arrange your own hosting, but it allows you to install any theme or plugin, run ads, and fully customize your site.
For most users looking to build a fully customizable and scalable site, WordPress.org is the way to go.
2. Choosing a Domain Name and Hosting Provider
Your domain name is your website’s address on the internet (e.g., www.yoursite.com), and web hosting is where your site’s files are stored.
Choosing a Domain Name:
- Keep it short, memorable, and easy to spell.
- Consider using keywords that reflect your business or niche.
- Avoid numbers and hyphens.
- Choose the right domain extension (.com is the most popular, but .net, .org, or specific country extensions are also options).
Choosing a Hosting Provider: A good hosting provider is critical for your site’s speed, security, and uptime. Some popular hosting providers include:
- Bluehost: Officially recommended by WordPress.org, great for beginners.
- SiteGround: Known for excellent customer support and performance.
- HostGator: Offers affordable plans with good features for new websites.
When selecting a plan, ensure it supports WordPress installations, offers sufficient storage, and includes SSL certificates for security.
3. Installing WordPress
Once you’ve chosen your hosting provider and set up your account, it’s time to install WordPress.
Most hosting providers offer a one-click WordPress installation process:
- Log in to your hosting account.
- Navigate to the cPanel or the control panel.
- Find the “WordPress” or “Website” section and select the WordPress icon.
- Click “Install Now” and follow the prompts.
- Choose your domain name and enter your site’s details (site name, tagline, admin username, and password).
- Click “Install” and wait for the process to complete.
Once the installation is finished, you can access your WordPress dashboard by going to www.yoursite.com/wp-admin.
4. Configuring Your WordPress Site
With WordPress installed, the next step is to configure your site’s settings.
General Settings:
- Site Title and Tagline: These appear in your browser’s title bar and in search engine results.
- Timezone: Set this according to your location.
- Email Address: This is where you’ll receive admin notifications.
- Membership: If you plan to allow users to register, enable this option.
Permalinks:
- Go to Settings > Permalinks and choose the “Post name” option. This makes your URLs more SEO-friendly.
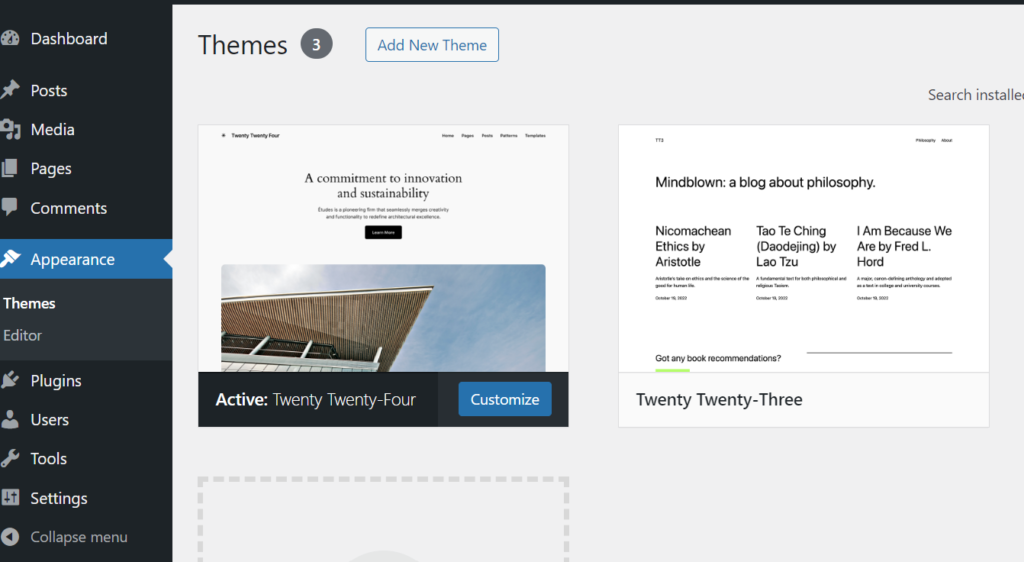
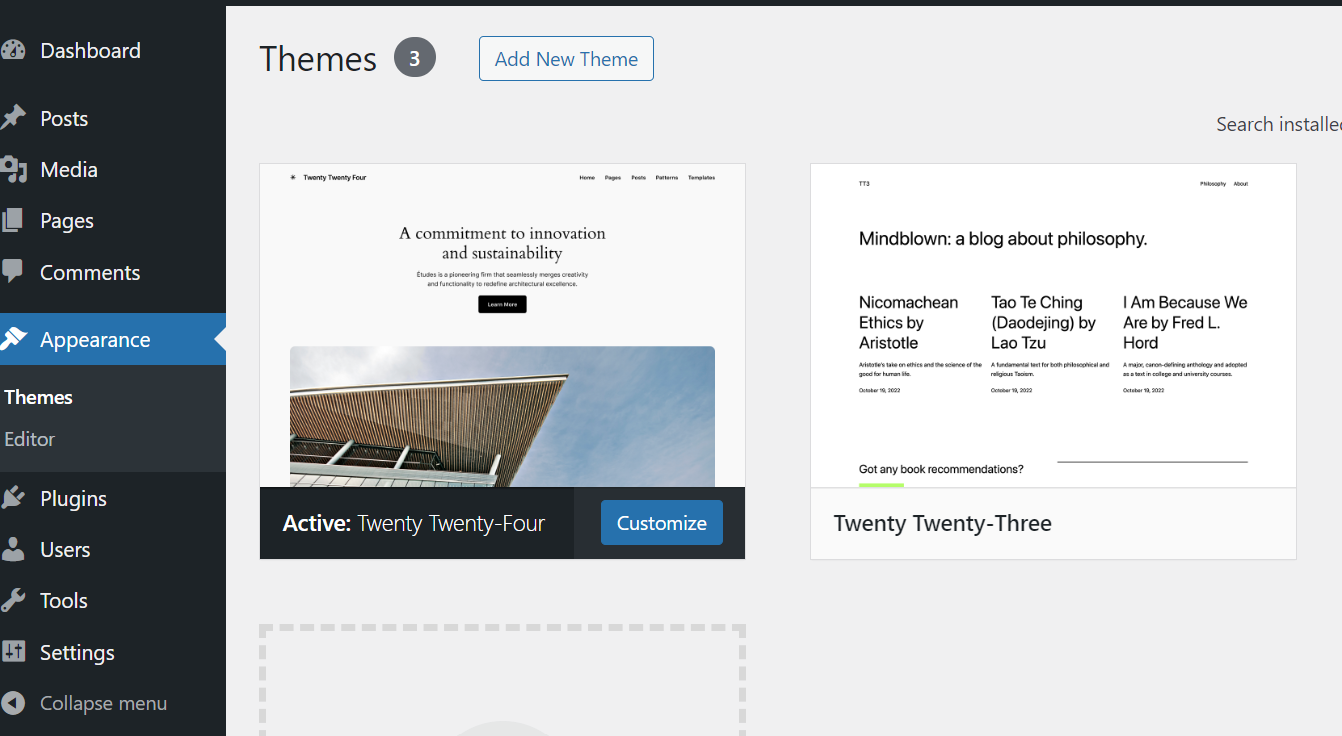
5. Choosing and Installing a Theme

Your WordPress theme determines the design and layout of your site. WordPress offers thousands of free and premium themes.
To choose and install a theme:
- Go to Appearance > Themes in your WordPress dashboard.
- Click “Add New” to browse free themes or upload a theme you’ve purchased.
- Preview themes to see how they look.
- Once you’ve found a theme you like, click “Install” and then “Activate”.
Remember, the theme you choose should be responsive (mobile-friendly), fast-loading, and customizable. You can always switch themes later, but it’s easier to start with one that suits your site’s purpose.
6. Customizing Your Site
With your theme in place, you can now customize your site’s appearance.
Customize the Appearance:
- Go to Appearance > Customize. Here, you can change the site’s colors, fonts, and layout.
- You can add your logo and favicon, customize the header, and adjust the site’s background.
Create Essential Pages: Every website needs a few key pages:
- Home: The main landing page that visitors see when they first arrive.
- About: A page that tells visitors who you are and what your site is about.
- Contact: A page with a contact form, your email address, and social media links.
- Blog: If you plan to publish articles, this is where they’ll appear.
To create a page, go to Pages > Add New in your WordPress dashboard.
7. Installing Essential Plugins
Plugins add functionality to your WordPress site. There are thousands of plugins available, but here are some essentials to start with:
- Yoast SEO: Helps you optimize your site for search engines.
- Akismet: Protects your site from spam comments.
- WP Super Cache: Improves site speed by caching your pages.
- Jetpack: Offers a suite of features including security, backups, and site stats.
- Contact Form 7: Easily add contact forms to your site.
To install a plugin, go to Plugins > Add New, search for the plugin you want, and click “Install Now”. After installation, click “Activate” to enable the plugin.
8. Securing Your WordPress Site
Security is crucial for any website. Here are some steps to secure your WordPress site:
- Update Regularly: Keep WordPress, themes, and plugins updated to protect against vulnerabilities.
- Use Strong Passwords: Ensure your admin password is strong and unique.
- Install a Security Plugin: Plugins like Wordfence or Sucuri provide additional security features.
- Backup Your Site: Regularly back up your site using plugins like UpdraftPlus to prevent data loss.
9. Launching Your Site
Before launching, review your site carefully:
- Test your forms: Make sure all contact forms work correctly.
- Check for broken links: Use a tool like Broken Link Checker to find and fix any broken links.
- Optimize for speed: Use tools like Google PageSpeed Insights to ensure your site loads quickly.
Once everything is in place, it’s time to make your site public! Share your site on social media, submit it to search engines, and start driving traffic.
Conclusion
Starting a WordPress site might seem complex at first, but by following these steps, you’ll be well on your way to creating a professional and functional website. Remember, WordPress is highly flexible, so you can always tweak and expand your site as you grow. Good luck with your new WordPress journey!
This article is structured to guide beginners through the process of starting a WordPress site, covering everything from domain registration to launching the site. If you have specific requirements or wish to adjust the focus, feel free to let me know!
Don’t Forget to Subscribe
Important: Stay in the loop! Join our insider’s circle for exclusive tips, special offers, and Bits & Bolts Fixers updates. Be the first to know, fix, and save! JOIN NOW

